00:00.0
00:04.9
Hye Guys, Whats Up. Today, We are going to create something New
00:05.8
00:07.6
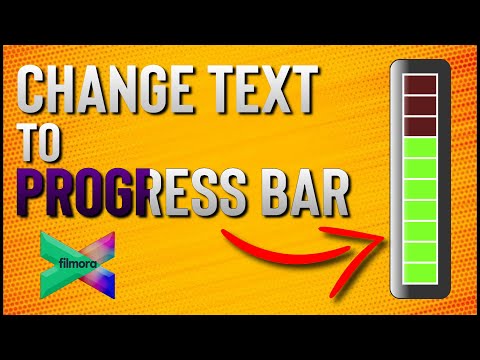
Today we are going to create Text Video Bar.
00:07.7
00:08.7
Text Video Bar??????
00:08.8
00:10.8
Check out this Video
00:26.6
00:31.4
We are going to convert Text to Progress and Sync it with Music/Audio
00:31.5
00:34.9
let's begin today's Video
00:42.5
00:47.3
I have already created Text with Title along with Music Name
00:47.4
00:52.2
"The Journey Begins". To create Text Progress Bar
00:52.3
00:57.1
go to sample color select any sample color of your choice
00:57.2
01:02.0
I am using Gradient 3. Drag n drop it on top track
01:02.1
01:06.9
and double click on it and shrink it according to the requirement
01:07.0
01:11.8
keep it's size same as The Journey Begins text
01:11.9
01:16.7
so that it covers the text. now aline it on text and go to blending mode
01:16.8
01:21.6
change it to multiply and again aline its position
01:21.7
01:26.5
keep it size same as text. double click on it and go to Animation
01:26.6
01:31.4
Keep playhead at starting position and change X Axis position
01:31.5
01:36.3
drag gradient out of text on x axis position
01:36.4
01:41.2
then take playhead further and here
01:41.3
01:46.1
change x axis position in a way that it fills whole text
01:46.2
01:51.0
with gradient 3. Then Select keyframe and drag it
01:51.1
01:55.9
to the end of clip. Now go to project media and drag n drop audio track
01:56.0
02:00.8
on audio track and adjust all the Text clips
02:00.9
02:05.7
according to audio files duration
02:05.8
02:10.6
Now let's Play it
02:20.3
02:25.1
Now let set full audio track. choose any audio track
02:25.2
02:30.0
drag n drop on audio track 2 and then
02:30.1
02:34.9
delete previous audio track and zoom on timeline
02:35.0
02:39.8
and set all the text files duration as audio duration
02:39.9
02:44.7
match it with audio file and then extend gradient color
02:44.8
02:49.6
and change keyframe position by draging it.
02:49.7
02:54.5
Now this full track is synced with audio track
02:54.6
02:59.4
Now you will see, when you move playhead further
02:59.5
03:04.3
text fill start moving as per music duration
03:04.4
03:09.2
This is how you can create
03:09.3
03:14.1
text progress bar in easy way. Now let see another way to create it
03:14.2
03:19.0
Now copy all text files and audio files and paste it further
03:19.1
03:23.9
go to sample color, drop which color on top track
03:24.0
03:28.8
then double click on it
03:28.9
03:33.7
now aline it and create thin bar
03:33.8
03:38.6
and aline that bar just under the music title
03:38.7
03:43.5
Now aline again it's position in such a way
03:43.6
03:48.4
that it keep under the Music title
03:48.5
03:53.3
you can keep bar thickness as per your choice
03:53.4
03:56.9
again go to sample color and drag n drop another color
03:57.0
04:01.8
I am choosing gradient 5. You can choose as per your choice
04:01.9
04:06.7
Now define its position just above the white bar
04:06.8
04:11.6
Keep it in such a way that it keeps on white bar only
04:11.7
04:16.5
and change blending mode to multiply
04:16.6
04:21.4
and the select gradient file, go to animation
04:21.5
04:26.3
add keyframe at starting and define it's position at X axis
04:26.4
04:31.2
and drag it outside the white bar. Now take playhead further and Here
04:31.3
04:36.1
change x position and drag it inside and cover white bar with gradient color
04:36.2
04:41.0
now render it
04:41.1
04:45.9
let's play it
04:48.9
04:53.7
so this is how you can create progress bar with the help of
04:53.8
04:58.6
keyframes in very easy steps in filmora. Now we will see
04:58.7
05:03.5
how can we use it. So first
05:03.6
05:08.4
we export it. Alway export on high bitrate
05:08.5
05:13.3
Give name to it and click on export
05:18.7
05:23.5
Delete files and go to project media
05:23.6
05:28.4
now import exported file and import
05:28.5
05:33.3
one background
05:33.4
05:38.2
drag n drop video file on track 2 and drag n drop background on
05:38.3
05:43.1
track 1 and double click on it and
05:43.2
05:48.0
change blending mode of video file to screen or linear dodge
05:48.1
05:51.8
Now let play it
06:03.4
06:08.2
So this how you can create text progress bar and
06:08.3
06:13.1
progress bar under text and sync it with music
06:13.2
06:18.0
or audio or you can set text or bar duration with audio/music
06:18.1
06:22.9
see you in next video with new Tutorial Till then
06:23.0
06:25.4
stay safe, stay health and good Bye
